Bonsai trees are beautiful and amazing. But, they can be a little difficult to manage. Don’t worry! In this article, you’ll learn how to make your own DIY bonsai pots that will give you that natural feel without all the effort!
What is Bonsai ?
Content Overview
Bonsai is the ancient art of growing miniature trees in pots. It is a practice that originated in China and Japan, and has been practiced for centuries. Bonsai can be created from many different kinds of trees, including fruit trees, flowering trees, and evergreens.
The most satisfying DIY bonsai pots you can make at home are ones that are creative and unique. There are many different ways to make bonsai pots, and the sky is the limit when it comes to creativity.
You can use any type of potting material, such as clay, plastic, or even ceramic. You can also decorate your pots with paint, stencils, or other embellishments.
Making your own bonsai pots is a great way to save money, as well as get exactly the look you want for your miniature tree.
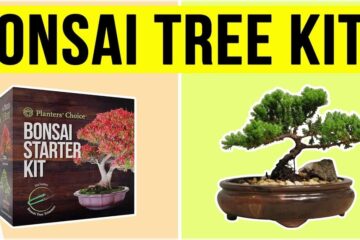
If you are new to the world of bonsai, there are many online tutorials and best bonsai books available to help you get started. Once you have the basics down, you will be able to create beautiful bonsai pots that will be the envy of all your friends!
Tools Required
Bonsai pots are small pots used to grow miniature trees. Bonsai means “tray planting” in Japanese. These pots are usually glazed or unglazed ceramic, and they come in a variety of shapes and sizes.
You can buy bonsai pots at most garden centers or online, but they can be expensive. If you’re looking for a more affordable option, you can make your own bonsai pots at home with a few simple supplies.
Here’s what you’ll need to make your own bonsai pots:
-Clay ,woods and cements
– A potting mix designed for bonsai trees
– A container to use as a mold (a plastic container or bowl works well)
– A piece of screen or mesh to line the mold
– Bonsai wire (copper or aluminum)
– Potting tools (trowel, scissors, etc.)
– Glazes and/or paint (optional)
Making your own diy bonsai pots is a satisfying project that can save you money in the long run. With a little time and effort, you can create beautiful pots that will showcase your miniature trees
Step 1: Collecting Materials
Before you can start making your diy bonsai pots, you need to gather all the necessary materials. For this project, you will need: clay, wood, cement, a pottery wheel (optional), and a paintbrush.
The first step is to collect all of these materials so that you have everything you need to get started.
The type of material you use will depend on what type of bonsai tree you want to grow. Using ceramic clay, for example, would be perfect for growing a Japanese azalea tree.
If you are growing a ficus tree, however, you’ll need to mix cement with either stones or sand in order to make your diy bonsai pots.
The second step is to decide on a shape and size for your pots using whatever materials you choose.
Once you have collected all of your materials, it’s time to begin constructing your pots.
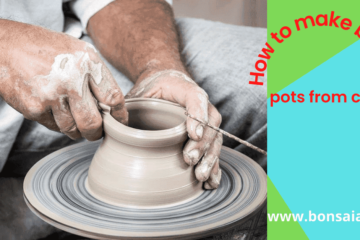
Start by using a pottery wheel or similar tool to make sure that your clay is rolled out flat and smooth. If you don’t have access to a pottery wheel, then use a rolling pin instead. When choosing your clay, make sure that it is thick enough so that it will harden when dried.
No matter what material you choose, the important thing is to make sure it has drainage holes to allow excess water to escape. You don’t want your bonsai roots to get too wet and start rotting. Other than that, have fun and get creative!
Step 2: Cutting Wood Into Shapes
Now that you have all of your materials, it’s time to start making your own diy bonsai pots! Begin by cutting your wood into the desired shapes and sizes.
If you’re using a saw, be extra careful not to cut yourself. Once you have all of your pieces cut, it’s time to move on to the next step.
Once you have all of your pieces cut, it’s time to move on to drying and finishing. You’ll need to soak them in water for several hours or even overnight, depending on how large they are.
This will allow them to absorb water and reduce their size, making it easier for you to place them in a mold later. After they’re dry, brush off any extra sawdust before you finish them by smoothing out their edges with sandpaper.
Next, it’s time to make your mold. Create a channel in each piece of wood using a drill, then form it into a cup shape by cutting off any excess wood.
This will ensure that your pot has ample drainage space. Repeat these steps with each piece of wood you’re using and place them all inside a larger mold to dry out completely.
After that, it’s time to start building your bonsai pot. Begin by adding a base layer of soil and compost to your mold. Add more soil as needed to ensure that each piece of wood sits comfortably inside.
Then, use a mixture of sand and cement to make a small mound in each piece of wood for your tree to sit on. Let these harden completely before planting your trees inside!
Step 3: Sanding and Filling Holes
You will want to sand your bonsai pot down to make it smooth. Be sure to get rid of any rough edges or holes.
Once you have a smooth surface, you can start filling in any holes with cement. Just be sure to let the cement dry completely before moving on to the next step.
Now it’s time to make sure your bonsai pot has a hole on top for water to drain. Just be sure not to make it too big, or else your bonsai may dry out before you are ready for watering.
Once you have all of your holes filled in and smoothed over, it’s time to do a second sanding. This will make sure that your bonsai pot is completely smooth. Be sure to give it plenty of time to dry before continuing on.
Now that your bonsai pot is completely smooth, it’s time to fill it with cement. Cement is pretty easy to work with and doesn’t require much skill or practice.
Just be sure to be careful when you’re working with wet cement, since it will set quickly. If you make a mistake, you can always add more cement or sand and smooth things out.
While you wait for your cement to dry, you’ll want to focus on your next project: creating a hole in your bonsai pot for soil. If your pot is slightly larger than you need, sanding it down will give you just enough space for a little extra soil.
Step 4: Applying a Top Coat
One way to make bonsai pots is from clays. Clays can be formed into any shape and then fired in a kiln. Once the clay is fired, it is very strong and can hold up to the elements.
Another way to make bonsai pots is from woods. Woods can be cut and shaped into any pot design and then finished with a clear top coat. The last way to make bonsai pots is from cements.
To make a DIY bonsai pots from clays, first you need to mix your clay and then roll it out. Once you have rolled out your clay, let it sit for about 15 minutes so that it can harden slightly. Next, create your shape on a flat surface using something like tape or lines drawn with chalk.
To make a DIY bonsai pots from woods, first you need to shape your wood. Once your wood is shaped, let it dry for about 15 minutes. Then sand it and then top coat it with something like polyurethane or varnish. Some woods cannot be stained so if you plan on staining them you’ll want to do that step before shaping your wood.
To make a DIY bonsai pots from cements, first you need to get your cement mixed. Then roll it out and begin to shape it on a flat surface. Once your cement is shaped, let it dry for about 15 minutes. Next sand and then top coat with polyurethane or varnish. When you’re ready to put in soil, drill holes into your DIY bonsai pots using a drill bit that’s similar in size to your potting soil particles.
Step 5: Potting Plants in Your Finished Pots
Now that your pots are complete, it’s time to pot your plants! If you’re using clay pots, make sure to soak them in water for a few hours before potting your plant. This will help the clay absorb moisture and prevent it from drying out your plant. If you’re using wooden pots, you can skip this step.
When planting your plant, try to follow these steps:
- Place a layer of drainage material (gravel or sand) in your pot so that water can drain out easily when you water your plant.
- Fill your pot with regular potting soil. 3 to 4 inches should be enough, depending on how big your pot is and how large your plant will get.
- Set your plant in place and fill any extra space around it with more potting soil.
- Water your plant until water comes out of drainage holes. If you’re using clay pots, be sure to refill them with water often. Clay pots can dry out very quickly!
- Water your plant as often as needed to keep it from drying out. Clay pots will need to be refilled much more often than wooden diy bonsai pots.
- Congratulations! Now that your plants are potted, it’s time to decorate! Decorate your plant pots to match any room of your house or add a little bit of color with paint.
How to Shape Your Diy Bonsai Pots
No matter what your skill level is, anyone can make a beautiful bonsai pot at home with a little bit of creativity and imagination. Below are some tips on how to shape your DIY bonsai pots to get the most satisfaction out of your creation.
1. Select a pot that is the right size for the tree you want to use. The pot should be no more than one-third the height of the tree.
2. Choose a pot with smooth sides so that the tree’s roots can easily grip onto it.
3. Make sure there are drainage holes in the bottom of the pot so that water can drain out properly.
4. Use a sharp knife or pair of scissors to create a jagged edge around the top of the pot. This will give your pot a more natural look.
5. Paint or decorate the pot however you like! Get creative and have fun with it.
Paint and Decorated Your Diy Bonsai Pots
Traditional watercolor brushes are excellent for painting and decorating your DIY bonsai pots. These can be found in any art supply store.
Pottery Paint – Choose a neutral color for your pottery paint. One of the best is a matte finish that’s free of shine or glare.
Glaze – This will add shine to your finished pots after you’ve painted them.
Now your DIY bonsai pots is ready for painting! Apply a coat of paint in three layers: base, middle, and top.
Each layer should be about as thick as peanut butter. After each layer dries, lightly brush away excess paint with a damp cloth.
Allow the DIY bonsai pots to fully dry for two days before adding another coat of paint and letting it cure for five days before applying an additional coating of gloss.
Once dried, spray the inside of your DIY bonsai pots with sealant to protect the decoration from water damage. Done! Your DIY bonsai pots is complete and now ready to welcome your favorite plant.
Conclusion
In summary, making your own diy bonsai pots from woods or cements can be very satisfying. If you have the time and patience, it can be a great way to get into the hobby.
Just make sure to do your research before you start and be prepared for a bit of trial and error. With a little practice, you’ll be able to create beautiful diy bonsai pots that will add a touch of elegance to your home.